
Router Bits for Acrylic: A Mirror Edge Straight Off the CNC — and Why 80% of Sign Shops Still Polish by Hand
Why routed acrylic edges come out matte and how to get a mirror finish straight off the CNC. ST01, ST36 and ST28 single-flute bits, feeds & speeds, and a cost breakdown for sign shops.
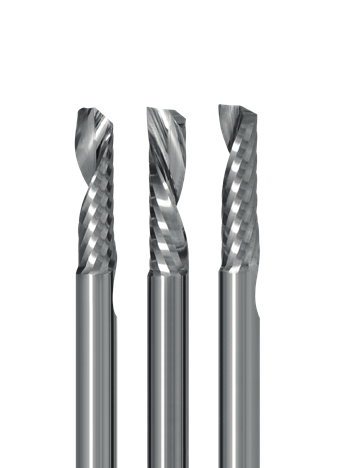
Why routed acrylic edges come out matte, what separates a general plastics bit from a dedicated acrylic bit — and how a single tooling change can eliminate the entire polishing station. A guide to the ST series, feeds and speeds for PMMA, and a cost breakdown for sign shops.
Key takeaways
- Acrylic is unforgiving — it is a transparent material: every tool mark on the edge is in plain sight, especially under LED illumination.
- A standard plastics bit (ST01) cuts well, but not to display standard — fine for structural parts, usually not for an illuminated sign.
- The ST36 is designed to do one thing: leave a mirror-like edge — no flame polishing, no buffing compound, straight off the machine.
- A two-pass strategy makes the difference — a roughing pass with a small allowance plus a slow finishing pass gives a result you will not get in a single hit.
- Thin sheets and small parts are a different game — that is where the gentle 15° helix (ST28) or a classic down-cut (ST51) wins, because an up-cut can lift the part off the bed.
- The maths is simple: if someone in your workshop stands with a torch after the CNC — you are paying twice for the same edge.
Acrylic — the material that looks easy
Acrylic (PMMA — Perspex, Plexiglas) is in every sign shop in the UK. Built-up letters, lightbox panels, POS displays, guards, LED-illuminated display stands — all made from the same material that cuts easily, has no grain, no knots, and machines more pleasantly than many a furniture board.
The problem starts at exactly the moment the customer picks up the finished part and looks at the edge against the light.
Acrylic is transparent. That means the routed edge is not "the side of a panel" that nobody looks at — it is part of the product. Every micro tool mark, every dull patch, every feed line is visible. And if there is an LED strip inside, the material works like a light guide and highlights every imperfection even more.
That is why the process in most sign shops has looked the same for years: the CNC cuts, then a person tidies up. With a torch, buffing compound, abrasive paper. Part after part.
And it is exactly this stage that can, in most cases, be cut out of the process — with the right router bit.
Why the edge comes out matte
Let us start with what actually happens when routing acrylic.
Acrylic is a homogeneous material, so none of the problems known from timber apply — no tear-out, no chipping, no grain. In return it is highly heat-sensitive and "optically unforgiving". Edge quality comes down to three things:
- The geometry and finish of the cutting edge itself. A general-purpose plastics bit leaves an edge that is technically correct — straight, free of tear-out — but with visible micro lines from each pass of the edge. On polyethylene you will never see them. On transparent acrylic — you will.
- Chip evacuation. If the swarf does not clear cleanly, it starts to re-melt and smear along the edge. That is why good plastics bits have a polished flute and a polished rake face — the material does not stick, the chips fly out, the edge stays clean. Some manufacturers dropped the polishing to cut costs. On acrylic you can see it from the very first cut.
- Parameters. Acrylic likes high spindle speeds and a sensible feed rate. Too fast — the edge "snatches" and leaves pronounced lines. Too slow with the wrong geometry — the material heats up and melts.
Four plastics bits — and four different jobs
In the ITA Tools catalogue, single-flute plastics bits are the most extensive group. Not because the manufacturer likes multiplying part numbers — but because "plastics" is, in practice, four completely different situations at the machine.
ST01 — the workhorse
The standard single-flute finishing bit in up-cut geometry (chips pulled upwards), 25° helix, polished flute. If you machine polyethylene, nylon, POM or acrylic "structurally" — parts whose edge is not on show — this is the right tool. A wide range of diameters and cutting lengths, practically always in stock.
This bit should be the default answer to "what do I cut 10–20 mm plastic with".
ST36 — the bit that replaces the torch
Also up-cut, also single-flute — but engineered for one specific result: a transparent, smooth edge on acrylic, straight off the machine.
The difference is not marketing — it is visible to the naked eye. The edge after an ST36 is clean enough that in most signage applications the part goes from the machine straight to assembly — no flame polishing, no buffing, no finishing station.
Two things worth knowing:
- The ST36 comes on a rigid 6 mm shank (only the largest, 8 mm diameter, has an 8 mm shank) — to hold this edge quality, the clamping has to be stiff. Cutting diameters from 2 to 8 mm.
- The cutting lengths are matched to material thicknesses (e.g. a 3 mm bit with a 7 mm cutting length for 6 mm sheet, and a separate version for 12 mm). The rule: the closer the cutting length matches the sheet thickness, the better the edge.
Price-wise the ST36 is around 25% more than the basic ST01 — and clearly cheaper than the premium alternatives known in the sign trade, at the same class of finish.
ST28 — the up-cut that does not lift parts
Here we get to problem number two in signage: small parts and thin sheets. Small lettering, 2–3 mm parts, dozens of little shapes on one sheet. A classic up-cut pulls the swarf — and the material — upwards. With a small part and weak vacuum hold-down, that ends with the part ripped off the bed mid-cut.
The industry's standard answer is a down-cut bit. ITA, however, offers an in-between solution most competitors do not: the ST28 with a minimal 15° helix, designed for material thicknesses of 1–8 mm. It is still an up-cut — chips go up, the edge stays clean — but the lifting force is small enough that in roughly 80% of cases it replaces a down-cut. It also excels at trimming thermoformed parts.
If I had to name one router bit that UK sign shops simply do not know about — it is this one.
ST51 — the down-cut for special duties
That leaves the last 10–15% of cases: very thin materials and jobs where the part must be pressed down onto the bed at all costs. A down-cut bit pushes the swarf downwards and holds the part — but it has its price: the swarf stays in the kerf, can weld itself back in, and the edge sometimes needs touching up. That is why we treat the down-cut as a deliberate tool, not the default.
The complete guide: which bit for what
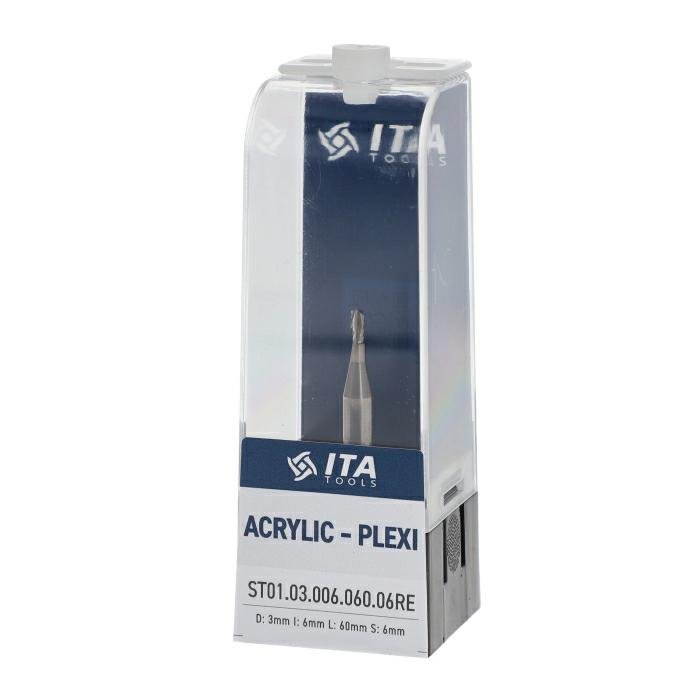
Acrylic-Plexi — ITA retail packaging
| Bit | Geometry | Best application | Feed* | Edge result | Example part numbers |
|---|---|---|---|---|---|
| ST01 | up-cut 25° | plastics in general, structural acrylic | 2–8 m/min | clean, technical | ST01.03.006.060.06R · ST01.04.012.060.06R · ST01.06.022.060.06R |
| ST36 | up-cut "super finish" | display acrylic, LED, built-up letters | 2–6 m/min (finish pass slower) | transparent, mirror-like | ST36.03.007.060.06R · ST36.04.013.060.06R · ST36.06.022.060.06R |
| ST28 | up-cut, 15° helix | small parts, thin sheets 1–8 mm, thermoformed trimming | 2–6 m/min | clean, no part lifting | ST28.03.012.060.06R · ST28.04.012.060.06R |
| ST51 | down-cut 25° | very thin materials, parts needing hold-down | 2–5 m/min | good, possible swarf welding in the kerf | ST51.03.006.060.06R |
*Indicative — depends on bit diameter, material thickness and type. All bits: high spindle speeds, polished flute and rake face, carbide grade selected for plastics.
Feeds & speeds for acrylic
Acrylic rewards one thing above all: stable, consciously chosen parameters. A sensible starting window for the single-flute ST series:
- Spindle speed: 18,000–24,000 RPM (ITA's official data sheet for the acrylic series); a practical reference point: finishing pass at around 18,000 RPM.
- Feed rate: 2–8 m/min depending on diameter and thickness — the catalogue conservatively quotes 2–6 m/min, with the upper values for experienced operators on rigid machines; go slower on thin, delicate parts.
- Depth of cut: typical signage thicknesses (3–10 mm) in a single pass; split thicker sheets into multiple passes.
- Cutting length choice: the shortest cutting length that will get through the material — a shorter bit = stiffer = a better edge.
The "mirror" technique: two passes
A single ST36 pass gives a very good edge. But if you make parts the customer will look at from 30 cm — do what the best shops do:
- Roughing pass — normal feed, leave a small allowance on the wall.
- Finishing pass — skim off just the allowance at a very slow feed, around 0.5 m/min at ~18,000 RPM.
The second pass removes a minimal layer and "irons" the edge to a finish where flame polishing simply has nothing left to improve. Tens of seconds per part — instead of minutes with a torch after it comes off the machine.
Flame polishing — let us count what it really costs
Flame polishing gives a nice result — nobody says it does not. But it is a separate production process, with its own time, risk and a person attached to it.
Example: a sign shop cuts 200 acrylic parts a week. Edge finishing (flame polishing / buffing) takes on average 3 minutes per part:
| Factor | Flame polishing after ST01 | Edge off the machine (ST36) |
|---|---|---|
| Finishing time / part | ~3 min | 0 min (opt. finishing pass on the CNC) |
| Time per week | ~10 hrs | ~0–1 hr of machine time |
| Labour cost per hour (UK) | £15–20 | — |
| Cost per week | £150–200 | the dearer bit spreads its cost over hundreds of parts |
| Risk | result depends on the operator's hand, overheating, rework | repeatable result from the program |
| Cost per year | £7,500–10,000 | the price difference between bits: a fraction of that figure |
Example figures — substitute your own. The bottom line does not change: if you make the edge twice (once with the bit, once with the torch), you pay twice.
FAQ — common questions
How is the ST36 different from a regular plastics bit, if both are single-flute up-cuts?
Refinement towards one result: a transparent edge on clear materials. This bit was developed over years specifically for display and illuminated acrylic — hence the rigid-shank-only policy. The ST01 cuts cleanly; the ST36 cuts to display standard.
I have small parts lifting off the bed. Down-cut?
Try the ST28 first. In most cases the gentle helix solves the problem without the drawbacks of a down-cut. Keep the ST51 for genuinely thin materials and edge cases.
Can I cut acrylic with a bit made for aluminium?
You can — carbide for aluminium has higher toughness and will handle the plastic (with somewhat shorter tool life). The other way round it does not work: a plastics bit in aluminium will chip its edge quickly.
Why does the ST36 not come on thin shanks?
Because edge quality starts with clamping stiffness. The whole range runs on a 6 mm shank (the 8 mm diameter — on an 8 mm shank); a thinner shank on a "super finish" class bit would throw away exactly what you are paying for.
After how many metres should I change the bit?
In acrylic the edge quality decides, not a table. The signals: the edge starts to dull, swarf begins to smear, the cutting note turns into a squeal. Log the metres on each bit at your parameters — after two or three bits you will know your interval to the day.
Pick the right bit for your acrylic
The full range of ITA Tools single-flute plastics bits — specifications, UK stock and prices.


